Hey everyone! Today's nails are inspired by all the beautiful triangle pattern prints that's been around for quite sometime. I've been wanting to get try create those repetitive triangle patterns but didn't have the courage to do so. Every time the thought of doing it pops up, I simply brush/push it away with this very excuse that goes in my head : It's going to be tedious, you're going to lose patience. You're not going to get the lines straight anyway.
Well, my usual brush, although at size 0, was still too thick to attempt such designs. But ever since I modified one of my old nylon brush, I don't see why not! So, I finally sat down and gave it a go.

Okay, now that I know what I wanna do. What or which colours? Needless to say, I couldn't decide on a combination, so I thought of doing similar shades together. One thing led to another and I finally ended up having these on my nails, geometric skittle triangles.
Since, most of the base colours (light cremes) required two/three coats for coverage and the triangles are going to be tedious I did not want these to turn out bulky so I've opt to skip the base colour. Besides, I'm covering the whole nails with triangles.
Initially, I've picked out 5 cremes of each colours. While I was working with the reds figuring how to successfully place the triangles I had a sudden urge to add/make 1 triangle a shimmery red shade. The idea sounded pretty fun for me and so each nail colours have 5 cremes and 1 shimmery accent triangle in them. Haha! They are not too obvious, some are though. Playing with a little hide and seek sort of idea. Are you able to spot them? ;)
After I was done with the colours on the four fingers, next was the thumb. But I had a problem. The rest of the colours didn't have enough similar creme shades. The closest I had was shades of grey which sums up to four cremes. Since I do have a few whites to spare, I frankened my fifth grey creme.
Definitely one of the most tedious nail art and time consuming nail art I've attempted. Every time I was done with one nail, I procrastinated few hours before finally moving onto the next. Hahaha! Ahh, despite it all, it was very worth it. Worth the time, worth the effort. I sure do look forward to more geometrical triangle nails! Hopefully in the future, I'd be able to choose much more fun colour combinations.
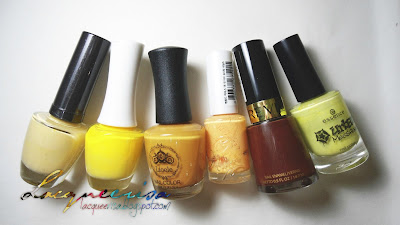
And now I'd show all the colours used in this design:
From left to right: The Face Shop YL701, The Face Shop YL702, Lioele 39, Etude House COR202, Revlon Chocolate Truffle, (the sixth colour is actually a mix between Essence Wall of Fame and Skin Food Pedicure Series 10)
Left to right: Inglot Black Matte, Revlon 'Revlon Red', Revlon Pretty In Papaya, Tip Top Nail Chic Red Rendezvous, Topshop Nails Country Bumpkin and Revlon Amber Ablaze.
Left to right: Etude House GR601, 17 Shine Wave, Elianto Turquoise, Etude House Ultra Green, The Face Shop GR501, Lucidarling 05
Left to right: Rubi Blue Suede Shoes, Revlon Fashionista, The Face Shop BL602, Tip Top Nail Chic In the Navy, Essence Let's Get Lost, Revlon Midnight Affair.
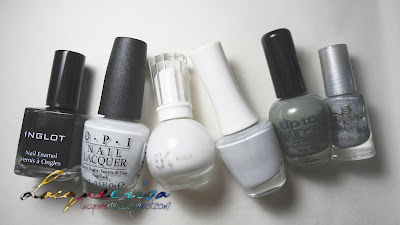
Left to right: Inglot Black Matte, OPI My Boyfriend Scales Walls, BK 02, Franken Grey, Tip Top Nail Chic Super Trooper, Essence Can't Cheat on Me.
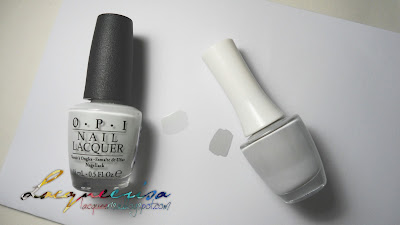
And here's a little side by side bottle shot comparisons between OPI My Boyfriend Scales Walls and Franken Grey. I thought they look very similar in bottles.
But, they are indeed different shade, and here's the test swatch. I've added few drops of black polish (Etude House CBK801) into the white polish and since I wanted it to be slightly warm, I've added few drops of dark brown (Revlon Chocolate Truffle) into the bottle as well. And about 10 drops of Mavala Nail Polish Thinner. Shake (roll) well.
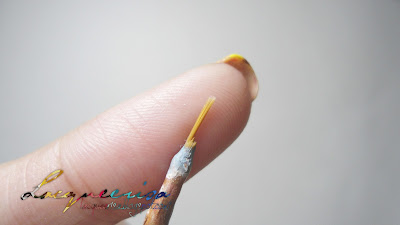
Last but not least, a shot of the DIY Mini Stripper Brush. Yeah, you can see how messy I am with my paint tools. Those were old dried acrylic paints covering the steel area. Hahaha!
Phew. I hope you've not mind me spamming so much pictures in this post! And that is all, I hope you've enjoyed the triangle nails look! Oh! I almost forgot, I'm so sorry but the giveaway won't happen until next month. My computer is giving me problems (BSOD problems!). So I'm kinda busy backing up my files and I have billions of files to go through! Lol!!


Woah those are awesome! I like the contrast of the yellow nail with that one darker color in there.
ReplyDeleteAww, thank you!! I thought it'll be fun to add some extremes in there! :)
DeleteWow it looks astonishing! I can tell there's been a lot of patience put up in this, but it's worth it, right? I love posts with a lot of pictures ;)
ReplyDeleteThank you!! It was totally worth it! Aww, I'm so happy that you enjoyed the pictures! Very comforting too! I thought I may have to try posting fewer pictures.
DeleteWow, that's a lot of work you did there. But the result is great.Worth it!!! Kiss you.
ReplyDeleteAww, *mwah mwah* kisses for you too! And thank you!! Yeah, it's pretty time consuming but the results were great and I had fun doing them! :D
DeleteBeautiful! As always!
ReplyDeleteThank you! :D
Deleteomg i absolutely love this! so cute! :) <3
ReplyDelete=D thank you! Glad you love it! <3
DeleteWowwww, looks amazing, your hard work really paid off! Geez, all those colours....if you're anything like me and like to have all the colours laid out, your table must have been overflowing xD
ReplyDeleteThank you! It really was! By the time I was done, I looked around me and not only had I occupied the table but part of the floor as well! :P
DeleteOh my! I love this mani! You did a great job!
ReplyDeleteThank you! It's definitely one of my favs too :D
DeleteWow!!! they are so amazing. Love the color combos and design. You def have the talent. Great job and keep it up!
ReplyDeleteThank you! Happy to hear you love it! It's really encouraging :)
DeleteIt looks gorgeous in all the combination :)
ReplyDeleteHaha! I know! Because triangles are just too awesome! ;P Thank you!
DeleteLovely, glad I found your blog, your designs are lovely :)
ReplyDeleteThank you so much!! And welcome to my little space! Haha! Here I'll serve thee with lotsa picture spams! (whenever I can) =P
Delete