Tuesday, 31 July 2012

NOTD - The Odd and Awkward

This post was suppose to be just a simple swatch and review post of Nails - Country Bumpkin by Top Shop.

NOTD - The Odd and Awkward

Here's what happened. I was swatching Country Bumpkin because I thought I've been using it pretty often but have yet to provide a swatch on it.

Country Bumpkin :

Nails TopShop Country Bumpkin
1 Coat
Nails TopShop Country Bumpkin
2 Coats

A few words about the polish first, I do adore the nail polishes by TOPSHOP. The brush although pretty small its flat and has a wide coverage. All those combining with the awesomely smooth nail polish formula provides such a wonderful experience in applying the polish. They are about 9ml per bottle. Its rather pricey (MYR 29.00 ?) but hey, I think its worth it.

So what happened? If you noticed in the above picture, I kinda messed up the application a little bit, and I thought I should redo it. But, I've swatched this before the Mermaid and I didn't want to take it off. Then I thought I'd just do it on my right hand. But, on my right hand's ring finger, lays a painstakingly freehand rose which was done in an attempt to create another "Grey and Mustard" nails theme (which only the rose succeeded). I couldn't bring myself to wash it away....

Nails TopShop Country Bumpkin
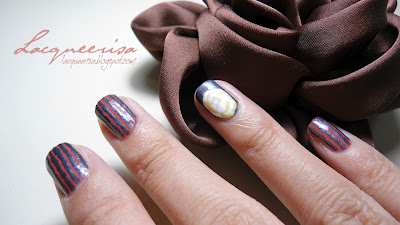
So, I painted on Country Bumpkin alongside with the rose. This is a better version of two coats of Country Bumpkin. And after much debate, I decided to turn it into a NOTD instead of leaving the flower wasted because I couldn't come up with a combination to match the rose. So, why not clash it good? That's when I added strips with my trusty dotting tools.

NOTD - The Odd and Awkward
There you go! The Odd and Awkward. Do note though, the irregular strips are intentional. Because the odd one is the Yellow Rose and the awkward ones are the awkwardly arranged together strips and colour combos. (hahaha!!)

NOTD : The Odd and Awkward

Well, I don't know about you, but I'm really liking this NOTD. Something to humour me throughout the day~!

Nail Polishes and tools :

  • The Face Shop YL701
  • The Face Shop WH002
  • Nails TOPSHOP Country Bumpkin
  • Skin Food Nail Vita GR901
  • Rimmel French Ivory
  • Small and Medium Dotting Tools


Swatch/Review: Nails Top Shop (NCOTD)

Today I planned to do a review/swatch of two polishes from Nails Top Shop. However, because they are heavy with pictures I've decided to split them up into two posts. 

In this post, I'll be swatching and reviewing this very lovely Mermaid nail polish by Top Shop.

Nails Top Shop Mermaid

Nails Top Shop Mermaid

Nails Top Shop Mermaid - 1 Coat
This is just 1 coat. I was quite surprised it turned out to be pretty sheer. Hmm, I think it looks pretty good as well although just in 1 coat.

Nails Top Shop Mermaid - 2 Coats
This is 2 coats. You can see that its really starting to transform into the "mermaid" colour. Ahh, but I really wanted the rich colour I see in the bottle so I went for another coat.

Nails Top Shop Mermaid - 3 Coats
Opaque on the third coat. Although not as dark as the colours seen in the bottle, its satisfactory for me. I love it at three coats. This Nails Mermaid by Top Shop has some really pretty colours blended together. It has this silver shimmers, light blue shimmers and slight purple tint to it. And the best part is the little small gold flecks that are present in this colour that makes it special.

Nails Top Shop Mermaid
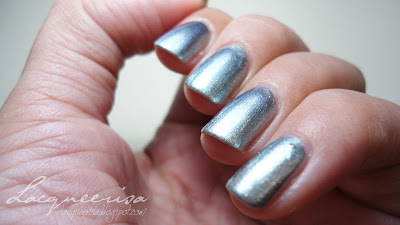
Here's an angle to show you guys the colour shift. You can see how the colour changes that gradually changes from silver to light blue to purplish-grey hues. And spot those little gold flecks shining like little jewels under the big blue sea.

Nails Top Shop Mermaid Matte

Nails Top Shop Mermaid Matte

Nails Top Shop Mermaid Matte

Out of curiosity, I've decided to matte-iffy these lovelies. And they WOW-ed me completely! Look at the complete transformation from a mysterious silver blue colour to a light and extremely enchanting fairy tale finish! This nail polish is no doubt one of my favourites! I can't decide which I like best. Gloss or matte? I like both the same. What do you guys think?

Saturday, 28 July 2012

I Heart Chocolate Mint.

Good morning ladies!

Today I'll be sharing with you this:

click image to source

Haha! I wish I had baking skills. I'd gladly pamper myself with chocolate mint anytime! Unfortunately, I can only drool over the image while hoping that someone will be kind enough to bake it for me (or purchase it for me, hehe). 

I'd still be sharing a Chocolate Mint sort of recipe, except, its not the usual one; A Chocolate Mint Inspired Manicure. 

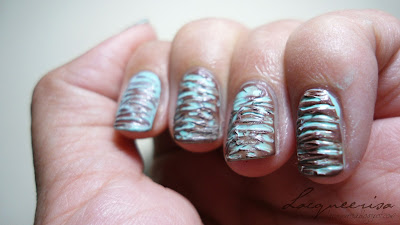
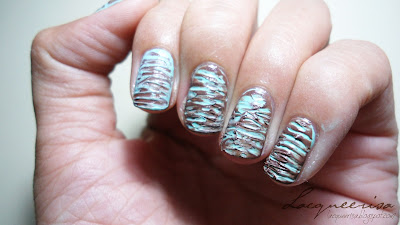
NOTD - Chocolate Mint
So ladies, what do you think? Looks delicious? Are you drooling yet? Would like to have some of these chocolate mint goodness on your nails too? I've prepared a really simple recipe that all you lovelies may follow and spread the love of chocolate mint ♥ !

The Recipe :

Chocolate Mint Manicure Tutorial

How to:

Step 1 : Prepare 3 coats of your favourite mint nail polish colour on each of your nails. Allow polish to dry fully or you might mess up. (3 coats so that you have a thick base colour.)
Step 2 : Focusing on 1 nail at a time, use a brown nail polish (or any chocolate-ty colours you have) and apply 1 fairly thick coat on top of the mint colour.
Step 3/4/5 : While the brown polish is still wet, use a toothpick (the pointy side) and draw random horizontal lines across the nail plate. Adjust pressure in order to create variation of thick and thin lines. Be careful not to put too much pressure or you might scrap off the bottom colour.
Step 6 : Repeat step 2 - step 5 to the rest of the nails individually.
Step 7 : Allow time for nails to dry.

*tips : I prefer my nails to maintain the raw look of the textures because I think that they look more like Chocolate Mint cream/ice-cream that way. Which is why I have not used top coat in any of these images shown. In my opinion, applying the top coat kills the look of Chocolate Mint manicure. Should you still prefer to put on a top coat, perhaps applying them horizontally across the nails would help maintaining a certain amount of the Chocolate texture over the Mint.

That is all for today! Have a very Chocolaty Minty Saturday!


Nail Polishes and Tools used :
1. Skin Food Nail Vita BR609
2. The Face Shop GR501
3. Toothpick


Thursday, 26 July 2012

My Lucid Bubble: Red Carpet Lacquer Giveaway!

Hi Girls! Don't forget to check out the giveaway hosted by My Lucid Bubble! Its so simple and its open internationally!

My Lucid Bubble: Red Carpet Lacquer Giveaway!: A giveaway! I love giving away nail polish. This giveaway is for three brand new bottles from Red Carpet Lacquer that were very kindly giv...

Sandy Glitters

I'll be showing you guys these two lovely Sandy Glitters by BeauKiss which I've purchased sometime ago. Bought these two colours because I really love them together. And they reminds me of Christmas! :D

Sandy Glitters BeauKiss 02
BeauKiss 02 is a really beautiful wintery light blue sandy glitter. Its a rather small bottle and only 9ml. If I did not remember wrongly its above MYR 10.00. I can't give the exact price since I've forgotten how much each of these cost. The brush is medium and soft and allows  you to have maximum coverage. The solution is quite thick. Good to go at 1 coat but feel free to go two coats if necessary.

Sandy Glitters BeauKiss 20
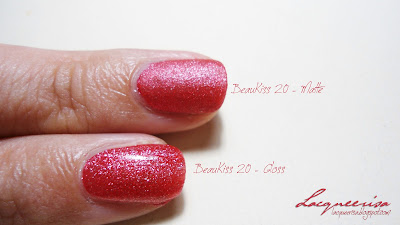
Okay, I had no idea that their colour codes were that similar. Haha! Just found that out today. Anyway, BeauKiss 20 is a really beautiful glittery cherry red. Its pretty hard to capture but it do have a slight orange tinge to it. Good to go at 1 coat, also feel free to use two coats if you want.

Here's a quick comparison between matte and gloss topcoats:

Sandy Glitters BeauKiss 20
Top Coats used: Inglot's Matte Top Coat and Essence Quick Dry Top Coat.


Names and Signature or Just Signature?

As the title of this post states, I'm wondering if I should continue including Names of the nail art done and my signature, or I should/must forfeit art names and only include watermark/signature

If you have followed my blog, you'd noticed I do have a habit of placing names of the NOTD I did, as well as including my watermarks in the same frame of the photo. (but when I just started out, I didn't really do that, it is a recent development). Well, you could say I do like it that way; having the title and my watermark. It was why I've made my pictures 16:9 ratio. But, if it were to cause confusions like:  maybe I watermarked over another person's art work... I wouldn't want that.

So, I would love to hear your opinion regarding this matter; whether I do or do not need to change the way I do my pictures. Should there be a need to change, I'm willing to. 

Thank You. 

Tuesday, 24 July 2012

Sandwich, please?

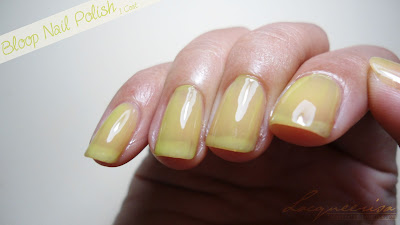
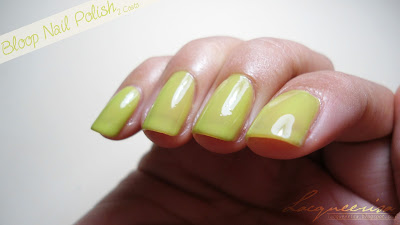
A few days ago I found a very pretty lime green, its not too neon for my skin colour. Just right, I suppose. Its a nail polish by Bloop. Unfortunately, I do not know what the colour code is or the real name of the colour. It's not stated anywhere on the bottle. So, if any of you know what the name of this colour is, do feel free to drop me a comment below about the name. For the time being, I'd just refer to this colour as lime green.

Bloop Nail Polish
MYR 8.90

Bloop Nail Polish
Bloop Nail Polish
Bloop Nail Polish
The brush is big and round. Application wise, smooth, no streaks, and super-duper glossy! However, it do require the usage of icy cold water dipping to prevent the bubbles. Drying time, normal. 

When I did the first coat, the first thing that came into my mind was "wow, this is going to be great for those sandwich nail art that I've been seeing around on the world wide web".

And that was exactly what I did for today's NOTD; A Green Lime Jelly Sandwich.

NOTD-Green Lime Jelly Sandwich

Ingredients:
Base Coat
Bloop Nail Polish
Sheng Ji #58 (review here)
Bowl of Icy Cold Water (optional)
Sally Hansen's Insta-Dri Anti Chip Top Coat (or your favourite top coat)

Method:
1. Prepare nails with base coat. Let dry. (lol)
2. Start off with a good thin coat of Bloop Nail Polish. Let Dry.
3. Apply a coat of Sheng Ji #58 on every nails and allow drying time.
4. Apply another coat of Bloop Nail Polish onto the glitters. Allow polish to dry. 
(If result is satisfactory, you may stop here. If not, feel free to repeat step 3 and 4). 
5. Season your sandwich with a good layer of Sally Hansen's Top Coat. And you are done!

*Optonal: Dipped your hands into a bowl of icy cold water in between layers to speed up drying time and prevent bubblings. 

So, how do you like the sandwich? I had fun executing it though, and looking forward to make more to see the different results it could bring. :D 

Swatch/Review: Skin Food Nail Vita

Good Morning Readers!

Today, I'll be showing you guys two more swatches of Skin Food's Nail Vita polishes that are in my stash.

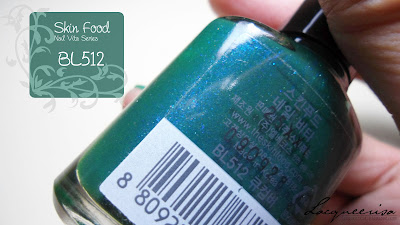
First up! Skin Food Nail Vita BL512, which was also previously used in my Bohemian Inspired Nail Art. Its a shimmery blue-green colour and micro blue glitters in it. Opaque in two coats.

Skin Food BL512
Skin Food BL512
Skin Food BL512
Skin Food BL512


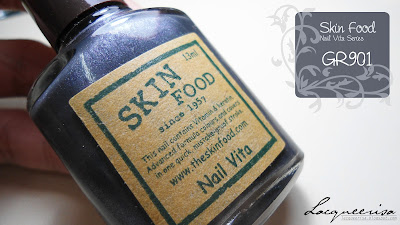
Now for Skin Food Nail Vita GR901. Its a dark silverish cool gray colour. What I meant by cool is, its not a warm gray. Its a little streaky, but consistent. So it wasn't too much of a hassle. Opaque in two coats.

Skin Food GR901
Skin Food GR901
Skin Food GR901
Skin Food GR901

Yeap, that's all for now. Kinda lacking in inspirations for NOTDs. Oh, I just did my first attempt at jelly sandwich nail art. I'd probably get the post up later in the day or tomorrow.

Monday, 23 July 2012

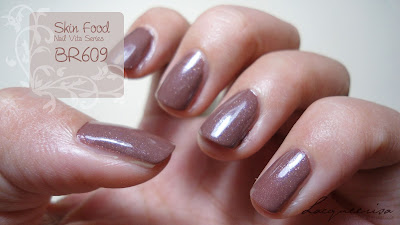
NCOTD : Skin Food Nail Vita BR609

Yeap, you read that right. NCOTD; an abbreviation for Nail Colour of The Day. Haha! Well, because NOTD in my definition is nail arts done or nail colours gained when layered with other nail polishes or glitters. Again, that is my definition for it. Its a subjective matter.

So yes, actually this post seems more like my usual swatching and reviewing of nail polish brand or colours. Except, I really adore this nail polish. I've been wearing it just as it is for 3 days and I'm not willing to take it off! Which is why I've decided that there's nothing else more suitable to share on today, except this lovely nail colour.

NCOTD - Skin Food Nail Vita BR609

The Swatch/Review : 

Skin Food Nail Vita BR609

Amazing. And needs only two coats. Noticed the mini-tiny-itsy-bitsy micro gold glitters in it? That was what made this nail polish so special to me. Plus the colour is really stunning. Its a milky chocolate sort of colour. Which is perfect for most of my outfits. I especially love how well this matches up with my pair of grey jeans.

I am so in love. <3